





By Matt Kolberg, Technical Consultant: Infrastructure, SolidCAD
So, you have a shiny new point cloud with a gazillion points in it, and you need a surface model in Civil 3D. It sounds easy, and it mostly is, provided you do the heavy lifting in Autodesk ReCap Pro before Civil 3D ever sees the data.
The short answer
To create a Civil 3D surface from a point cloud, convert the scan to a ReCap project (RCP), run ground classification in ReCap Pro, then decimate the ground points to a count Civil 3D can handle (ideally under 2 million). Export the resulting key points to a new RCP, attach it in Civil 3D, create the surface from the point cloud, and choose No Filter on the last page of the wizard.
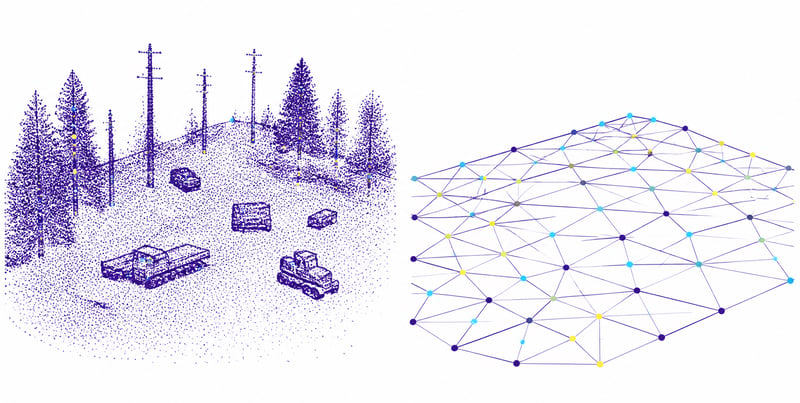
Step 1: Bring the point cloud into ReCap Pro
Point clouds come in many flavours: E57, LAS, LAZ, TXT, FARO, Leica, and the list goes on. Civil 3D does not import these formats directly; it reads only Autodesk ReCap files (RCP or RCS). Open ReCap Pro, import your scan file, and save it as an RCP.
Step 2: Decide how many points Civil 3D actually needs
Civil 3D cannot build a practical surface from a gazillion points. Twenty million would be a stretch; one million is no problem. On nearly every point cloud, a primary goal is to reduce the point count to something Civil 3D handles comfortably.
Results vary by project, but I aim for fewer than 2 million points wherever possible. Above that threshold, Civil 3D creates a companion MMS file for the surface. That is not a problem in itself; I simply prefer not to manage the extra file. If a project genuinely needs more, so be it. Autodesk explains the behaviour in its Civil 3D surface documentation.
How do we reduce the number of points? There is a two-part answer:
- Remove every point that does not lie on the surface of the earth. This is called ground point filtering, or ground classification.
- Intelligently decimate the remaining points. An algorithm reduces the count while keeping the terrain accurate.
ReCap Pro has done both since version 2024.1. Run ground classification first, then decimation.
Step 3: Run ground classification in ReCap Pro
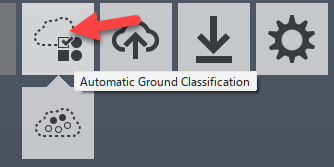
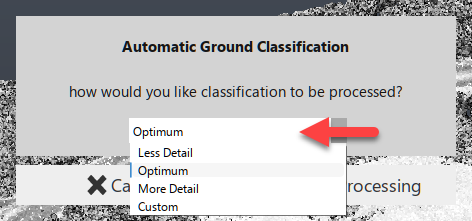
I usually use the Optimum setting, although some sites call for one of the other options.
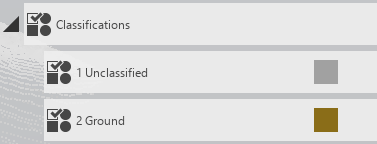
When it finishes, the Project Navigator shows two classifications:
- 2 Ground: points deemed to be on the ground.
- 1 Unclassified: everything else.
Step 4: Decimate the ground points
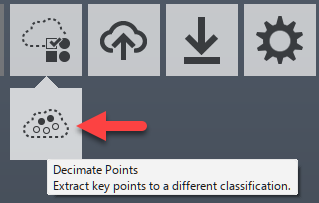
Opinions vary on the options here, and there is no single right number of points for every surface. A useful frame of reference:
- One million points for the entire province of British Columbia is not enough.
- One million points for a single parcel that fits a modestly sized house is far too many.
- There are several ways to verify that you have not removed too many points. That deserves its own article, so stay tuned, or contact us to discuss.
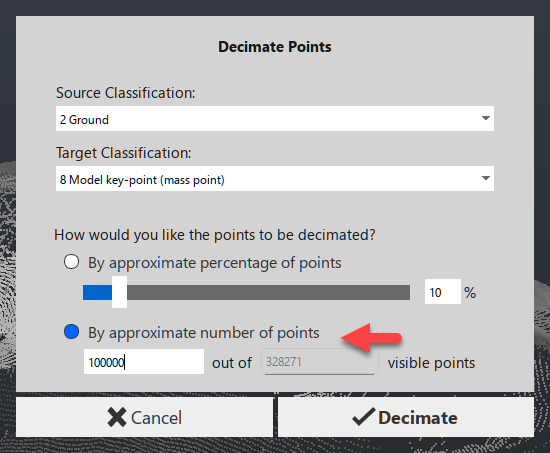
Note 1: The 2 Ground classification is selected as the input. This is why ground classification comes first; there is no sense making the software decimate points it will never use.
Note 2: Decimation creates a new classification, 8 Model key-point. These are the points that will build the Civil 3D surface.
Note 3: My preference is to specify the exact number of points I ultimately need.
Step 5: Export the key points to a new RCP
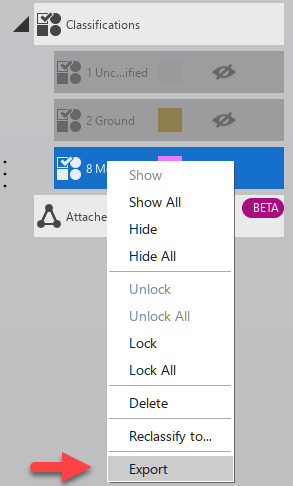
With those two tasks complete, you have just enough points to make a surface. Export the points from the 8 Model key-point classification that ReCap Pro created during decimation. They are saved as a new RCP file, which you can attach (XREF) in Civil 3D.
Step 6: Create the surface in Civil 3D and choose No Filter
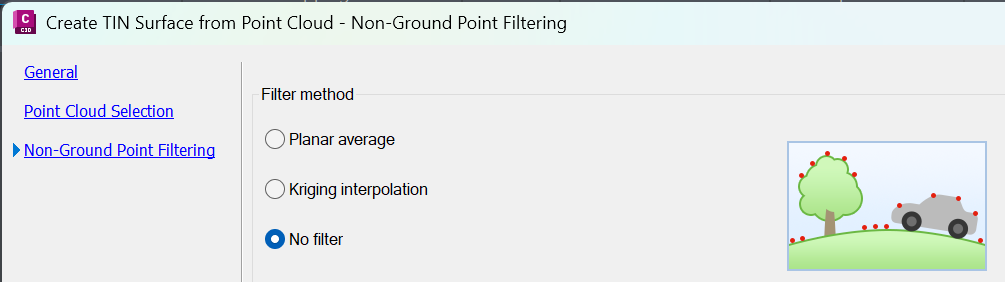
Once in Civil 3D, there is really only one thing to watch. Select the point cloud and create a surface from it. A wizard opens.
On the last page of the wizard, choose No Filter. Either of the other options makes Civil 3D attempt its own ground classification. ReCap Pro has already done that work, so nothing good comes from doing it again.
A parting thought
If the person who purchased the point cloud says, "I paid good money for 100 million points, dang it, I want you to use them!", I would suggest having a serious conversation about what a surface model actually needs.
Happy surfacing.
Frequently asked questions
Can Civil 3D import LAS, LAZ or E57 files directly?
No. Civil 3D works with Autodesk ReCap point cloud files (RCP or RCS). Import the scan into ReCap Pro first and save it as an RCP.
How many points should a Civil 3D surface have?
It depends on the site and the accuracy required. As a working target, keep the surface under 2 million points; above that, Civil 3D creates a companion MMS file for the surface.
Should I classify ground or decimate first?
Classify ground first, then decimate only the 2 Ground points. Decimating the full cloud wastes processing time on points the surface will never use.
Which filter should I choose in the Civil 3D surface wizard?
Choose No Filter. Ground classification has already been done in ReCap Pro, and the other options make Civil 3D repeat it.
Which version of ReCap Pro supports ground classification and decimation?
Both tools are available in ReCap Pro 2024.1 and later.
Related reading
Next step
Point clouds are only as useful as the surfaces your team can build from them. SolidCAD infrastructure specialists help civil teams set up repeatable reality capture workflows in ReCap Pro and Civil 3D, so every project starts from a surface you can trust. Contact SolidCAD at info@solidcad.ca.
Unlock expert insights: connect with SolidCAD today!
Discover how SolidCAD Insights can accelerate your business growth and transformation. From industry trends to practical strategies, our experts are here to help. Contact us today to discuss your needs and explore solutions tailored to your business.
